Showing posts with label Publishing. Show all posts


Whether you are printing a book, manual, catalog, or other multi-page document, you will likely have a choice between two commercial production methods: Offset Printing and Digital Printing.
Both methods are very popular, but there are distinct differences between the two. Understanding these differences will help you determine which is a better fit for your specific book project.
A Quick Overview of Offset Printing…
Offset printing is extremely common, yet most people are not familiar with how the process actually works. Offset printing uses a series of rotating cylinders to apply the ink to paper. Each ink color on the Offset press has its own set of cylinders. For full color projects, the inks are applied in successive layers to create the final image.
The first cylinder has a printing plate formed around it. Usually made of plastic or thin aluminum, plates are custom made for each print job and contain the images that will be transferred to the paper. The plates are treated so that certain areas attract ink while other areas attract a water solution. As the Plate cylinder spins, the ink is distributed onto the plate. The water solution is also distributed onto the plate. Because the plate has been specially treated, the ink adheres to the image areas while the water solution repels ink from the non-image areas.
The next roller in the sequence has a rubber blanket around it. This roller is called the Offset or Blanket cylinder and turns in the opposite direction of the Plate cylinder. As the Plate cylinder rolls against the Offset cylinder, the water on the plate is squeezed away and the ink on the plate is transferred to the rubber blanket. The Offset cylinder receives a mirror image of the ink design to be printed.
The final roller in the sequence is called the Impression cylinder. It turns in the opposite direction of the Offset cylinder. It presses the paper against the rubber blanket to transfer the ink to the paper. The image on the paper is now identical to the image on the plate.
A Quick Overview of Digital Printing…
Digital Printing is different from the Offset printing method because it does not involve the use of printing plates. Instead, the digital files to be printed are electronically transferred directly to the press for output. The press then applies the ink directly to the paper in a single pass. Being able to print without plates is the primary benefit of Digital printing because it saves the time and expense of plate creation, which is beneficial for shorter production runs.
Most people can relate to the function of a commercial Digital printing press because it operates similar to a desktop printer one might find in an office or home. Like a desktop printer, the ink used in a Digital printing press can be in powder form, like toner, or in liquid form. However, a commercial Digital press is much bigger and faster than a desktop printer. Plus, it offers much better quality than a desktop printer.
Digital printing has been the fastest growing segment of the printing industry. As a result, substantial technological advances have been made in recent years and Digital printing is gradually approaching the quality level of high-end Offset printing. Even though the quality gap is narrowing, it is important to note that Offset presses still outperform the print quality of Digital presses.
Five Factors that help determine which Production Method is better suited for your Book Printing Project…
1) Order Quantity: The number of books you need will generally dictate the production method. As a general rule, Digital printing will be the more cost-effective choice for short production runs, like 150 or 250 books. However, as the order quantity increases, Offset printing becomes the more cost-effective production method.
A Digital printing press has minimal set-up costs associated with a production run. Unlike an Offset printing press, a Digital press does not use printing plates. So there is no expense involved with plate creation when printing digitally. Also, preparing for a Digital press run requires very little “make-ready” time and few adjustments. Because the costs associated with set-up are minimal, short run books have a lower unit cost when produced on a Digital press.
Conversely, an Offset press requires printing plates, longer prep time and more preliminary adjustments to establish a smooth production run. These plate charges and higher set-up costs would inflate the book’s unit cost on a small production run because they cannot be effectively distributed over a limited number of books.
However, as the order quantity increases, to say 500 or 1,000 books, Offset printing is by far the more cost-effective production method. Even though the set-up costs of an Offset press run are greater than those associated with a Digital press run, a larger order allows these higher initial costs to be distributed across more books. And once an Offset press is running, the actual cost of applying ink to paper is substantially less than that of a Digital press. So with Offset printing, the book’s unit cost decreases as the order quantity increases.
2) Urgency: The Digital printing route will almost always enable your book order to be produced faster than the Offset route. In addition to the time saved by not having to create printing plates and prepare the press, the ink or toner used by a Digital press is instantly dry. Also, because Offset presses are used for longer print runs, there will likely be a somewhat longer wait for press time. So, if you need some books in a hurry then Digital production is your best option.
That said, let’s say you want to order a total of 2,000 books but only need 200 of them quickly. You could opt for Digital production of the 200, and then still enjoy the unit cost savings on the remaining 1,800 by having them produced on an Offset press.
3) Budget: The exact order volume that determines which of the two printing methods is more economical will vary from project to project. But, as a rule of thumb, when ordering books in smaller quantities, Digital printing will be the more economical choice. And when ordering books in larger quantities, Offset printing will be more economical.
Digital printing is a good fit for new ventures and start-ups. Offset printing is ideal for proven and more-established projects that necessitate the additional volume. Incidentally, just because the unit cost of a book decreases as the order quantity increases, it is still wise to consider which run size is optimal for your specific situation. A lower unit cost is great, but not if you’re ordering more books than you’ll ultimately need.
4) Dimensions: Offset Presses can print on larger sheet sizes than Digital presses. Fortunately, most of the common book sizes can be produced on either a Digital or Offset press. However there are some instances where the physical dimensions of a book may prevent it from being produced on a Digital press.
For example, let’s say you want to print a saddle-stitched book with a finished size of 11” wide x 8.5” high. This is actually a rather common format. Because a saddle-stitched book is constructed from folded sheets, the pages and cover of an 11” wide book will need to be printed on sheets measuring at least 22” in width.
Even though Digital presses are increasing in size, many are still in operation that have a maximum sheet size of 13” x 19”. So unless a print shop has a larger Digital press to accommodate the minimum 22” needed, this particular book project would have to be produced on an Offset press.
The real dilemma arises when someone only needs a short run of these 11” x 8.5” books, because an Offset press may make this project too cost prohibitive to proceed. The solution is to alter the size of the book to better fit the available Digital press or increase the order size to make the Offset production more cost-effective per unit.
5) Options: Books produced on an Offset press offer the most flexibility because they can be made with just about any design feature, paper thickness, or finishing option available. However, Digital printing has a few limitations compared to Offset printing.
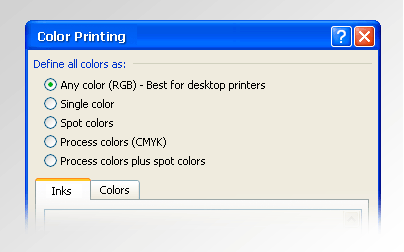
Even though Digital presses and Offset presses both print CMYK, only an Offset press can print true PMS Spot Colors. A Digital press can only approximate a PMS color. So, if you need a true PMS Color on the cover or pages of your book, it will need to be produced on an Offset press. Also, most Digital presses use toner-based inks, which may be incompatible with certain laminate and coating applications.
In addition, many Digital presses will only print on coverstock thicknesses up to 14pt. While this will accommodate the needs of many book projects, if a heavier weight book cover is desired it will need to be printed on an Offset press.
It is always a good idea to consult with your printer early in the book creation process to discuss your plans and specifications. A few minutes spent with your printer at the beginning will translate to less headaches down the road.

If you learn from this article please encourage by leaving a comment below. Thanks


If you need printing options that you don't have on your desktop printer, you can take your publication to a commercial printer that can reproduce your work on an offset printing press or a high-quality digital printer.
For example, you might want to print a publication in larger quantities, print on special papers (such as vellum or card stock), or use binding, trimming, and finishing options.
If you need hundreds of copies or even thousands, a commercial printer may be the most economical and efficient way to print your publication.
Microsoft Office Publisher 2007 has many features that can make it much easier for commercial printers and copy shops to prepare your publication for the printing process. The following tips will help you prepare your publication for output by a commercial printer or copy shop.

In this article

Tip 1: Discuss your project with your commercial printer
Tip 2: Always use Office Publisher 2007 or Publisher 2003
Tip 3: Choose your color model early
Tip 4: Make sure that your publication pages are the correct size
Tip 5: Allow for bleeds
Tip 6: Avoid using synthetic font styles
Tip 7: Avoid using tints for text at small font sizes
Tip 8: Size digital photos and scanned images appropriately
Tip 9: Use linked pictures
Tip 10: Use the Pack and Go Wizard to prepare your publication file

Tip 1: Discuss your project with your commercial printer

Consult with your commercial printer before and during the design process to save time and money later. Before you start your project, describe your project and goals, and find out your printer's requirements.
Before you create your publication, discuss the following:
  • Ask whether the printer accepts Publisher files. If you can't locate a commercial printer who does, you can ask about other ways to submit your publication for printing. Most commercial printers accept PostScript files or PDF files, and they will provide instructions on how to create these files from your publication.
  • Tell the printer about your project's printing needs, such as quantity, quality, paper stock, paper size, recommended color model, binding, folding, trimming, budget, file size limitations, and deadlines. Always ask if the printer has the items that you want in stock.
  • Let the printer know whether your publication will include scanned pictures, and if so, whether you will scan them yourself or have a commercial printer or service bureau scan them.
  • Ask whether there will be any pre-press tasks, such as trapping and page imposition.
  • Ask for any recommendations that can save you money.
Top of Page

Tip 2: Always use Office Publisher 2007 or Publisher 2003

The following tips were written especially for Office Publisher 2007 and Microsoft Office Publisher 2003. Office Publisher 2007 includes new and improved features that were designed to be used by professional printers. Your printer or service bureau will have more confidence in publications that are created in Office Publisher 2007 or Publisher 2003 than in publications created with earlier versions of Publisher.
When you open older publications in Office Publisher 2007, the program retains the appearance of the older files as much as possible. But publications that were created in earlier versions of Publisher sometimes look different from what you expect when they are opened in Office Publisher 2007.
Top of Page

Tip 3: Choose your color model early

Before you spend a lot of time designing your publication, decide whether you want to print your publication in color. If you print your publication to a high-quality digital color printer, you don't need to worry about color. Digital color printers accurately reproduce millions of colors. If you plan to print your publication on an offset printing press, you have several color-model options.
Offset printing requires that a professional press operator set up and run the print job. Generally, every ink that is needed to print the publication requires more setup for the operator and increases the cost. The number of inks that you need depends on the color model that you choose.
When you set up color printing for your publication, you can choose from the following color models:
  • Any color (RGB)
  • Single color
  • Spot colors
  • Process colors
  • Process plus spot colors

Any color (RGB)

If you print by using a digital color printer (such as a color desktop printer), you use the RGB (Red, Green, Blue) color model. When you print a few copies, this is the least expensive color model to print. RGB colors have the highest degree of variability of any color model, however, which makes it difficult to match colors between print jobs.

Single color

If you print by using one color, everything in your publication is printed as a tint of a single ink, which is usually black. This is the least expensive color model to print on an offset press because it requires only one ink.

Spot colors

If you print by using a spot color, everything in your publication is printed as a tint of a single ink — usually black — and a tint of one additional color, the spot color, which is usually used as an accent. Publisher uses PANTONE® colors for spot color jobs.
This color model requires a minimum of two inks and can increase the cost of printing on an offset press with each ink that you add.
Note: In some cases, printing spot colors may be more expensive than using process colors. This is commonly the case for short-run jobs.

Process colors

If you use this color model, your publication is printed in full color by combining varying percentages of the process-color inks cyan, magenta, yellow, and black, which are typically shortened to CMYK (Cyan, Magenta, Yellow, Key). Although you can combine these four inks to get almost a full range of colors, you can't get some colors. For example, the CMYK color model can't produce metallic colors or colors that are highly saturated.
Process-color printing always requires setting up the press with the four CMYK inks. It also requires skill on the part of the press operator to line up the impression of one ink with the others, which is called registration. These requirements make process-color printing more expensive than spot-color printing.

Process plus spot colors

This color model is the most expensive to print because it combines process-color printing (four inks) with one or more spot-color inks. You use this color model only if you want both full color plus a highly saturated or metallic color that can't be produced by using CMYK.

Choose a color model

When you choose a color model in Microsoft Office Publisher, the Color Picker displays only those colors that are available in the color model that you choose. For example, if you set your color model to Single Color, you can choose only line, fill, and text colors that you can make with that single ink color. If you set the color model to Spot Colors, you can choose only line, fill, and text colors that can be made by using your spot color inks.
To choose the color model for your publication, do the following:
  1. On the Tools menu, point to Commercial Printing Tools, and then click Color Printing.
  2. In the Color Printing dialog box, under Define all colors as, click the color model that you want to use.
    Color Printing dialg box
  3. If you choose either Spot colors or Process colors plus spot colors, you can click the New Ink button to choose additional spot color inks.
  4. Click OK.
Top of Page

Tip 4: Make sure that your publication pages are the correct size

Before you create your publication, you should decide what size you want the finished printed publication to be. Be sure to consult your commercial printing service.
After you determine the page size that you want, set it up in the Page Setup dialog box.
Make sure at this stage that the page size you choose in the Page Setup dialog box is the size that you want. It is difficult to change the page size after you start to design your publication. Also, your commercial printer will have trouble printing your publication to a different page size from the one you set up.
It is important to note that in page setup and printing, page size and paper size are two different things:
  • Page size always refers to the size of the finished page, after trimming.
  • Paper size always refers to the size of the sheet of paper on which you print the publication, before trimming.
In many cases, the paper size needs to be larger than the page size in order to allow for a bleed and printer's marks or to enable you to print more than one page per sheet of paper.
If you want to print multiple copies or pages on a single sheet of paper to create a booklet, you can do it easily in Publisher. Printing multiple pages on a single sheet so that they can be folded and trimmed to form a sequence of pages is called imposition.
Tip: To get the best results with imposition, talk to your commercial printer before you set up your publication. Your commercial printer may use a third-party imposition program to impose your publication.
As a general rule, whether you are going to use imposition or not, you should set your page size to be the final size of the item.
  • Business card, index card, and postcard sizes    If you want to print several small items, like business cards, on a single letter-sized (8.5 inches x 11 inches) sheet, set your publication page size to be the size of the cards (2 inches x 3.5 inches for business cards), not the size of the paper that you will print them on. In the Page Setup dialog box, you can set how many copies to print per sheet.
    How?
    1. In your publication, on the File menu, click Page Setup, set the page size, and then click Advanced.
    2. In the Custom Page Size dialog box, under Layout type, click Multiple pages per sheet or another appropriate option.
    3. Under Options, enter the values that you want in the Side MarginTop MarginHorizontal Gap, and Vertical Gap boxes.
    4. Click OK twice.
      Depending on the paper size that you selected and the margin values that you entered, Publisher fits as many copies of the item on the page as it can. You still see only one copy in the publication window, but when you print the publication, Publisher prints multiple copies on one sheet of paper.
  • Folded brochure sizes    If your publication is a single sheet of paper that will be folded one or more times, such as a tri-fold brochure or a greeting card, the page size should be the same as the finished size before you fold it. You should not consider each panel of the brochure to be a separate page. For example, if your publication is a tri-fold brochure that you will print on letter-sized paper, click the Letter page size in the Page Setup dialog box.
  • Booklet sizes    If your publication is a booklet with multiple folded pages (for example, a catalog or magazine), the page size should be the same as a single page after the piece has been folded. For example, if your publication page size is 5.5 inches x 8.5 inches, you can print these pages side-by-side on both sides of a single letter-sized sheet of paper. The booklet printing feature in Publisher arranges the pages so that, when you combine and fold the printed sheets, the pages are in the correct sequence.
    Set up a booklet in Publisher
    1. On the File menu, click Page Setup.
    2. In the right task pane, click Advanced.
    3. In the Custom Page Size dialog box, under Layout type, click Booklet. Under Margin guides, enter the measurements you want, and then click OK twice.
    4. On the File menu, click Print Setup, and then click the Publication and Paper Settings tab.
    5. Under Printing options, select Booklet, side-fold.
    6. Under Paper, select a paper size that can fit two pages side-by-side. Under Orientation, click Landscape.
    7. Click the Printer Details tab.
    8. Click the Printer name for the printer that you will print to. If you don't know what kind of printer or imagesetter your commercial printer will use, you can skip this step, or you can select your own printer and print a proof copy.
    9. Click OK.
      Your commercial printer will make sure that the printer and paper settings are correct for the device that will be used to print your booklet.
  • Complex imposition    Some imposition can involve a large number of pages that are printed on a single sheet, which is then folded several times and trimmed on three sides to produce a group of sequentially numbered pages. This kind of imposition can be done only by using a third-party imposition program.
Top of Page

Tip 5: Allow for bleeds

If you have elements in your publication that you want to print to the edge of the page, set these up as bleeds. A bleed is where the element extends off the publication page. The publication is printed to a paper size that is larger than the finished page size and then trimmed. Bleeds are necessary because most printing devices, including offset printing presses, can't print to the edge of the paper, and trimming the paper may leave a thin, white, unprinted edge.
To create a bleed in Publisher, enlarge the elements that you want to bleed so that they extend off the edge of the page by at least 0.125 inches.
Publication with bleeds
If the element is an AutoShape that you created in Publisher, you can easily stretch it. However, if the shape is a picture, you must take more care to ensure that you don't get the picture out of proportion or that you don't lose part of the picture that you want to keep when the page is trimmed.
Top of Page

Tip 6: Avoid using synthetic font styles

Typefaces are typically designed with different fonts to represent variations in the typeface. For example, the typeface Times New Roman is actually four fonts:
  • Times New Roman
  • Times New Roman Bold
  • Times New Roman Italic
  • Times New Roman Bold Italic
To simplify using the variations, when you apply the bold or italic formatting to text in Publisher, Microsoft Windows applies the appropriate font if it is available. For example, if you select some text in Times New Roman and then click Bold on the Formatting toolbar, Windows substitutes Times New Roman Bold for the font.
Many typefaces do not have separate fonts to represent bold and italic. When you apply bold or italic formatting to these fonts, Windows creates a synthetic version of the typeface in that style. For example, the typeface Comic Sans MS does not have an italic font version. When you apply italic formatting to text in Comic Sans MS, Windows makes the text look italic by slanting the characters.
Most desktop printers print synthetic font styles as expected, but high-end print devices, such as imagesetters, usually do not print synthetic fonts as expected. Make sure that you don't have any synthetic font styles in your publication when you hand it off to your commercial printer.

Check for the separate fonts that you want to print

To be sure that you don't have any synthetic font styles, you need to know what typefaces you are using and what variations are available as separate fonts. To see what typefaces you have used in your publication, do the following:
  • On the Tools menu, point to Commercial Printing Tools, and then click Fonts.
    The Fonts dialog box shows all the typefaces that are used in your publication.
To see what style variations of the typeface are available as separate fonts, do the following:
  1. On the Start menu, click Run.
  2. In the Run dialog box, in the Open box, type fonts, and then click OK.
    The Fonts window opens and displays a list of all the fonts and font variations that are installed on your computer.
  3. On the View menu, make sure that there is no check mark next to the Hide Variations (Bold, Italic, etc.) option, and then click Details.
  4. Check to see if the typefaces that you are using in your publication have separate fonts available for the styles that you want to use.
If a typeface is listed with only one variation, no separate fonts are available for bold, italic, or bold italic formatting. Most of the typefaces that have only one font available are decorative fonts and are not designed to be used in other variations.
Top of Page

Tip 7: Avoid using tints for text at small font sizes

If colored text is at a small font size, use colors that are solid spot color inks or colors that can be made up with a combination of solid process color inks. Avoid using a tint of a color.
Publisher prints tints as a screen, or percentage, of a solid ink color. When viewed close-up, the screen appears as a pattern of dots. For example, a 50 percent tint of green is printed as a 50 percent screen of the solid green ink.
Enlarged version of solid and tinted text
When the tinted text is at a small font size, the dots that make up the screen may be insufficient to clearly define the shape of the characters. The resulting text is blurred or speckled and hard to read. If the tint is a process color (using multiple inks), registration of the inks may be imperfectly aligned, which can add a fuzzy edge to the text.
If you want to color text at small font sizes, make sure that you use colors that will be printed as solid inks, not tints. The following are some possible color choices:
  • Black
  • White
  • Cyan
  • Magenta
  • Yellow
  • Red (100 percent Magenta, 100 percent Yellow)
  • Green (100 percent Cyan, 100 percent Yellow)
  • Blue (100 percent Cyan, 100 percent Red)
  • 100 percent tint of any spot color
Note: For text at larger font sizes, roughly 18 points and larger, tints are not a problem. Be sure to discuss the fonts that you want to tint with your commercial printer.
Top of Page

Tip 8: Size digital photos and scanned images appropriately

Graphics that are created by a paint program, a scanning program, or a digital camera are made up of a grid of differently colored squares called pixels. The more pixels a graphic has, the more detail it shows.
The resolution of a picture is expressed in pixels per inch (ppi). Every picture has a finite number of pixels. Scaling a picture larger decreases the resolution (fewer ppi). Scaling the picture smaller increases the resolution (more ppi).
If your picture resolution is too low, it will be printed more blocky. If the picture resolution is too high, the file size of the publication becomes unnecessarily large, and it takes a longer time to open, edit, and be printed. Pictures with more than 1,000 ppi may not be printed at all.
If the resolution of the picture is greater than what the printer is able to print (for example, an 800-ppi picture on a 300-ppi printer), the printer takes more time to process the image data without showing any more detail in the printed piece. Try to match the picture resolution to the resolution of the printer.
Color pictures that you plan to have printed by a commercial printer should be between 200 and 300 ppi. Your pictures can have higher resolution — up to 800 ppi — but they should not have a lower resolution.
Note: You sometimes may see picture resolution expressed as dots per inch (dpi) instead of ppi. These terms are often used interchangeably.

Effective resolution

A picture contains the same amount of information whether you scale it larger or smaller in your publication. If you want more details in your picture to appear as you enlarge it, you need to start with a picture that has a higher effective resolution.
Every picture in your publication has an effective resolution that takes into account the original resolution of the graphic and the effect of scaling it in Publisher. For example, a picture with an original resolution of 300 ppi that has been scaled 200 percent larger has an effective resolution of 150 ppi.
To find the effective resolution of a picture in your publication, do the following:
  1. On the Tools menu, click Graphics Manager.
  2. In the Graphics Manager task pane, under Select a picture, click the arrow next to the picture, and then click Details.
  3. In the Details window, the Effective Resolutionfield displays the resolution in dots per inch (dpi).

Reducing high-resolution graphics

If you have just a few graphics whose resolution is too high, you may have no problem printing them. If you have several high-resolution graphics, your publication will be printed more efficiently if you reduce their resolutions.
Important: Before you reduce the resolution of a graphic, consult with your commercial printing service about the resolution that you need.
In Publisher, you can reduce the resolution of one, several, or all pictures by compressing them.
  1. In Publisher, select one or more pictures whose resolution you want to reduce, right-click one of them, and then click Format Picture.
  2. In the Format Picture dialog box, click the Picture tab.
  3. Click Compress.
  4. In the Compress Pictures dialog box, under Target Output, click Commercial printing.
  5. Under Apply compression settings now, choose whether you want to compress all pictures in the publication or only the pictures that you selected, and then click OK.
  6. If a message appears asking if you want to apply picture optimization, click Yes.
    A 300-ppi version of the same picture or pictures replaces the high-resolution original picture or pictures.
Top of Page

Tip 9: Use linked pictures

When you insert pictures into your publication, you can embed them in the publication or link to the picture files. Inserting pictures into your publication as links reduces the publication size and makes it possible for the printer to edit any of the pictures separately or manage colors for all of them in one batch.
If you insert linked pictures, be sure to hand off the picture files along with your publication to your commercial printer. If you use the Pack and Go Wizard to prepare your publication for commercial printing, the linked pictures are included in the packed file.
Delivering a publication with linked pictures is especially important if you use Encapsulated PostScript (EPS) graphics, because you can't save a picture from Publisher in EPS format. The EPS graphic is available to your commercial printer only if it is supplied as a separate linked file.
To insert a picture as a link, do the following:
  1. On the Insert menu, point to Picture, and then click From File.
  2. In the Insert Picture dialog box, browse to the picture that you want, and then click it.
  3. Click the arrow next to Insert, and then click Link to File.
Top of Page


Tip 10: Use the Pack and Go Wizard to prepare your publication file

The Pack and Go Wizard packs a publication and its linked files into a single compressed file that you can take to a commercial printer. When you use the Pack and Go Wizard, Publisher does the following:
  • Saves a copy of the file and embeds those TrueType fonts that grant permission to embed.
  • Creates a compressed archive file, which includes the publication and all of its linked graphics.
  • Creates a PDF file that your printer may prefer to use.
    Note: You can save as a PDF or XPS file from a 2007 Microsoft Office system program only after you install an add-in. For more information, see Enable support for other file formats, such as PDF and XPS.
  • Copies the packed file to the drive of your choice.

Run the Pack and Go Wizard

  1. On the File menu, point to Pack and Go, and then click Take to a Commercial Printing Service.
  2. In the Take to a Commercial Printing Servicetask pane, in the How will this publication be printed? list, select the option that you want:
    If you will be using an offset printing service, select Commercial Press.
    If you will be using a high-end copy shop, select High quality printing.
    If you want to customize the PDF settings to match the settings on the target printer, click Other, and then choose the settings that you want.
  3. Click Printing Options.
  4. In the Print Options dialog box, make any needed changes, including printer's marks, and then click OK.
    Ask your printing service if you need to select any Printer's marks options.
  5. Under Select an item to fix, repair any problems that Publisher has identified.
  6. To create a PDF file, under Export, select the Create a PDF check box.
    You can save your publication as a .zip file or as a PDF file or both. Both are selected by default. If you are unsure which your commercial printing service prefers, leave both selected.
  7. Click Save.
  8. In the Pack and Go Wizard, choose the location to which you want to export the file, and then click Next.
    If you pack multiple publications, save each packed publication to a separate folder. Otherwise, the Pack and Go Wizard will overwrite any pre-existing packed publications.
    You can save the file to removable media, a hard disk drive, external drive, or network drive.
    Save files to removable media
    If you are taking your publication on disk to the printing service, click the appropriate drive (usually D or E for removable media such as a writable CD or USB Flash Drive).
    Save files to a hard disk drive, an external drive, or a network
    If you are putting your files on an external drive, a network, or your computer's hard disk drive, click Browse, choose the drive and folder that you want, and then click OK.
    You can later upload the file to a Web site if your commercial printing service uses file submission on the Web.
  9. Select or clear the Print a composite proofcheck box, and then click OK.
    The Print a composite proof check box is always selected by default. Use the composite proof to review and catch any errors in a printed version of your publication before you send the file to the commercial printer. If your commercial printer fixes errors in the file, the cost of printing usually increases.
    Note: If you make changes to your publication after you pack your files, be sure to run the Pack and Go Wizard again, so that the changes are included in the publication that you take to your commercial printing service.
If you learn from this article,  pls encourage us by commenting below. 
Powered by Blogger.